Project Scope
This was one of my first projects while interning at Copper. For this fixture, I had to design and develop a platform for tube shears to sit on in order to cut LED channels to length. Ultimately this was for a production run of at least 1500 uses where precision was key in order to avoid LEDs from bleeding out of the channel.
Prototyping Process

1) CAD Design
Recreating base of shears in SolidWorks and designing first iteration of fixture in order to cut LED channel to fit the slot made for LEDs in the picture above. 2 different lengths were needed here, one for each outer and longer piece, and a second length for the smaller piece in the middle.


2) First Prints
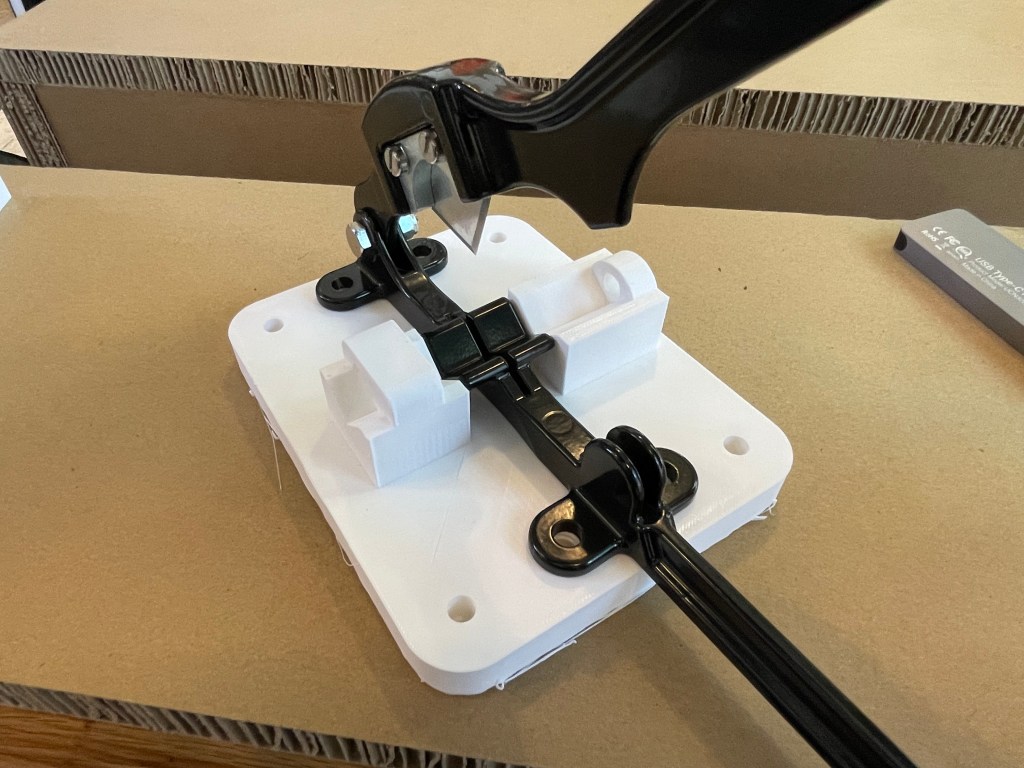
After solidifying a first iteration, I printed it on a Bambu Labs 3D printer and started doing some fit and functionality checks with the shears. In order to attach the shears to the 3D printed material, I used heat-set threaded inserts and bolts to fasten everything together.


3) Adjustments and Test Prints
After the first iteration was tested, I made some adjustments to the design and reduced part complexity by leveraging Bambu’s brilliant ability to print out complex geometry. In order to rapidly test dimension changes, I cut out insignificant portions of the design which reduced print time drastically and enabled me to run several tests without wasting excess material.

4) Measuring
After several rounds of iteration and a functional fixture, I performed several tests of cutting LED channel pieces to length and measured each one to ensure precision and accuracy.


5) Final Fixture Results
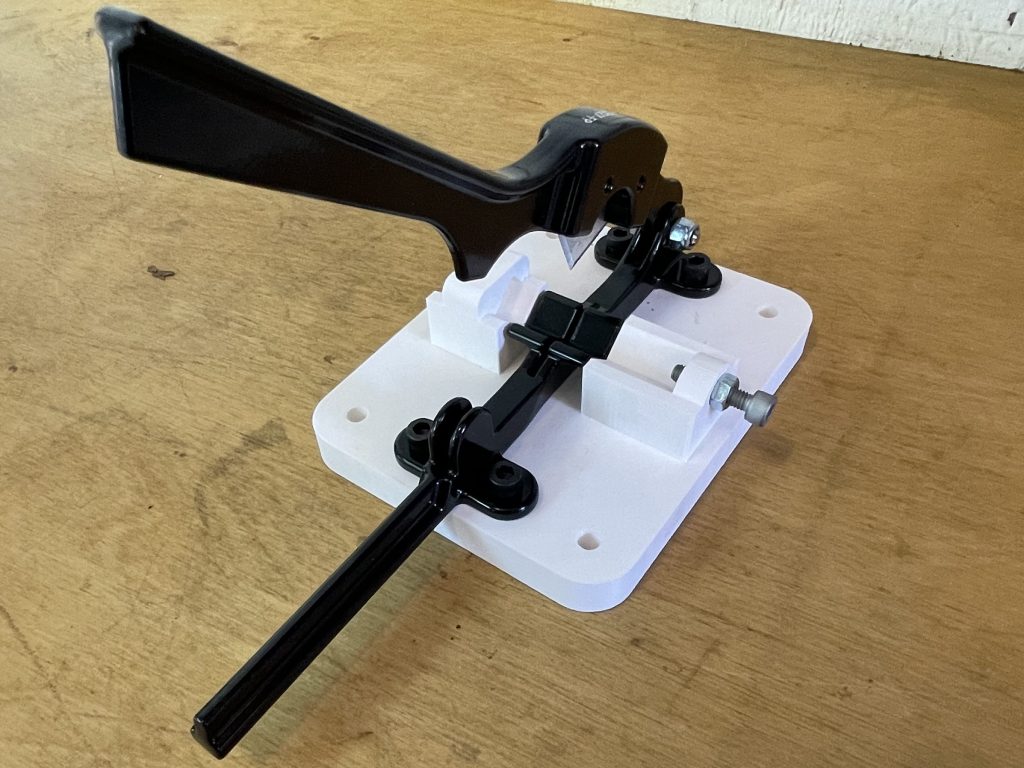
Pictured above are the two final fixtures to be used as part of the manufacturing line to cut two different sizes of LED channels to length. The fixture itself has 4 through holes so that it can be screwed to a workbench at the manufacturing facility.
Final Fixture

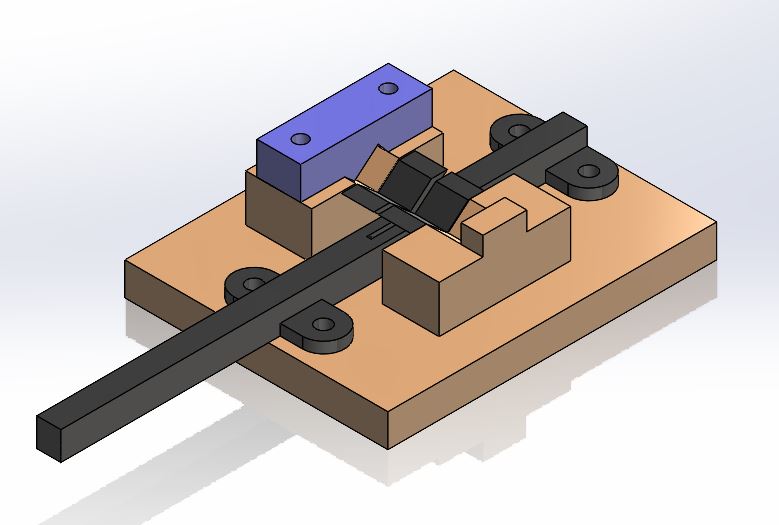
Here is an exploded view of the fixture with its components and fastening hardware included. A bolt was added on the stopper end for fine adjustments due to several factors including the LED channel arriving in a tension filled coil from the manufacturer which affected its length when being cut
Takeaways
| What I did: | What I learned: |
| -Measured with calipers, designed, printed, tested and adapted, repeated several times -Calculation of channel length with brakes -Exploration of several features for feeding LED Channel -Mixed hardware with 3d prints for fastening | -How to design 3D printed parts to be compatible with heat-set threaded inserts -Mitigating high pressure deadlines -Importance of getting a simple and functional design first, then improving it -Deciding when to move on to the next project even if there is more to be improved |